How to create and use checkboxes in Excel
In this article, you will learn how to create and use Checkboxes in Excel
What is the use of Checkboxes in Excel?
Checkboxes in Excel are useful for a variety of purposes. Here are a few common uses:
- Data validation: Checkboxes can be used as a form of data validation, allowing users to select or indicate specific options or choices. They provide a simple and intuitive way to make selections or indicate preferences.
- Interactive reports: Checkboxes can enhance the interactivity of reports or dashboards. Users can use checkboxes to control what information is displayed or hidden in the report. This allows for a more dynamic and customizable viewing experience.
- Task management: Checkboxes can be used for task management or to create to-do lists. You can create a checklist of tasks or items, and users can mark the checkboxes as they complete each task.
- Form controls: Checkboxes are commonly used as form controls in Excel. They can be part of a user interface where users can input or select information in a structured manner.
Overall, checkboxes provide a visual and user-friendly way to make selections, control data visibility, perform calculations, and enhance the interactivity of your Excel spreadsheets.
How to create Checkboxes in Excel?
To create checkboxes in Excel, you can use the Form Controls or ActiveX Controls available in the Developer tab. Here are the steps to create checkboxes using both methods:
Using Form Controls:
Step 1: Show the Developer tab: If the Developer tab is not visible in Excel, you need to enable it. Go to the "File" tab, click on "Options," and then choose "Customize Ribbon" Under "Customize the Ribbon" check the box next to "Developer," and click "OK"
Step 2: In the Developer tab, click on the "Insert" button in the Controls group. Under the "Form Controls" section, select the "Checkbox" option.

Step 3: Click and drag on the worksheet where you want to place the checkbox. This will create a checkbox object.
Note: After creating a checkbox, you can resize and move it as needed. You can also customize its properties, such as its label, size, and linked cell.
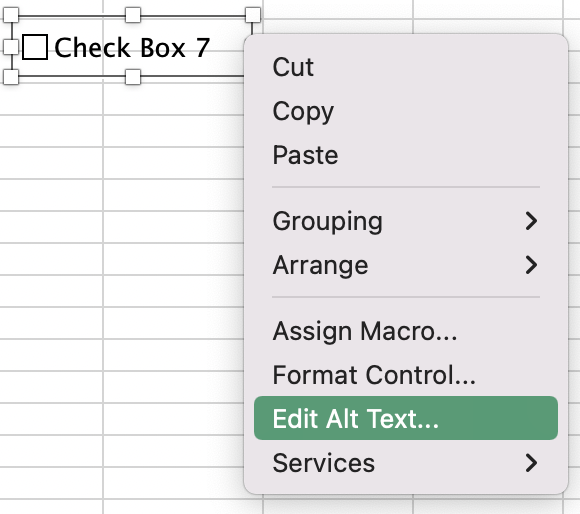
To link a checkbox to a cell, right-click on the checkbox and select "Edit Alt Text". In the "Cell link" field of the Format Control dialog box, enter the cell reference where you want to store the checkbox's value (usually TRUE or FALSE).
How to create To-do lists in Excel
One common use case of checkboxes in Excel is for creating interactive to-do lists or task trackers. Here's an example of how checkboxes can be used for this purpose:
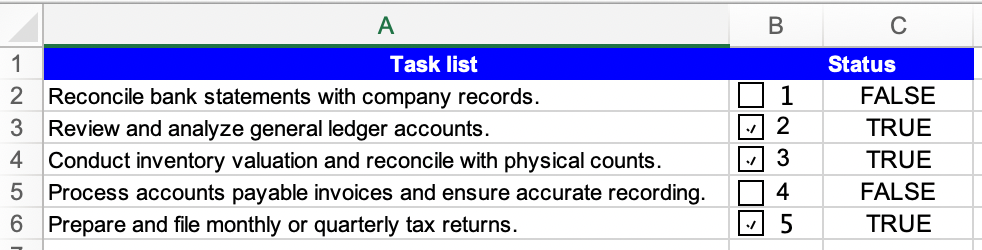
Step 1: In one column, list the tasks that need to be completed. For example, in column A, you can have a list of task names.
Step 2: In the adjacent column, let's say column B, insert checkboxes for each task. To insert a checkbox, go to the Developer tab, click on the "Insert" button in the Controls group, and select the "Checkbox" option under the "Form Controls" section.
Step 3: Right-click on each checkbox, select "Cell link" field of the Format Control dialog box, enter the corresponding cell reference where you want to store the checkbox's value. For example, link the first checkbox to cell C2, the second checkbox to cell C3, and so on.

By using checkboxes in this way, you can easily track the completion status of each task. When a task is completed, the user can simply check the corresponding checkbox, and the associated cell value will be updated accordingly.
This approach visually represents the task progress and allows for easy filtering or sorting based on the completed or pending status. It can be particularly helpful for project management, task tracking, or creating interactive to-do lists within Excel.