How to Set Print Area in Google Sheets
In this article, you will learn how to set up a printing area and print spreadsheets in Google Sheets.
In Goole Sheets, you don’t set up a print area or change the print settings before you open a print menu, which is different from Excel.
How to adjust print area in Google Sheets
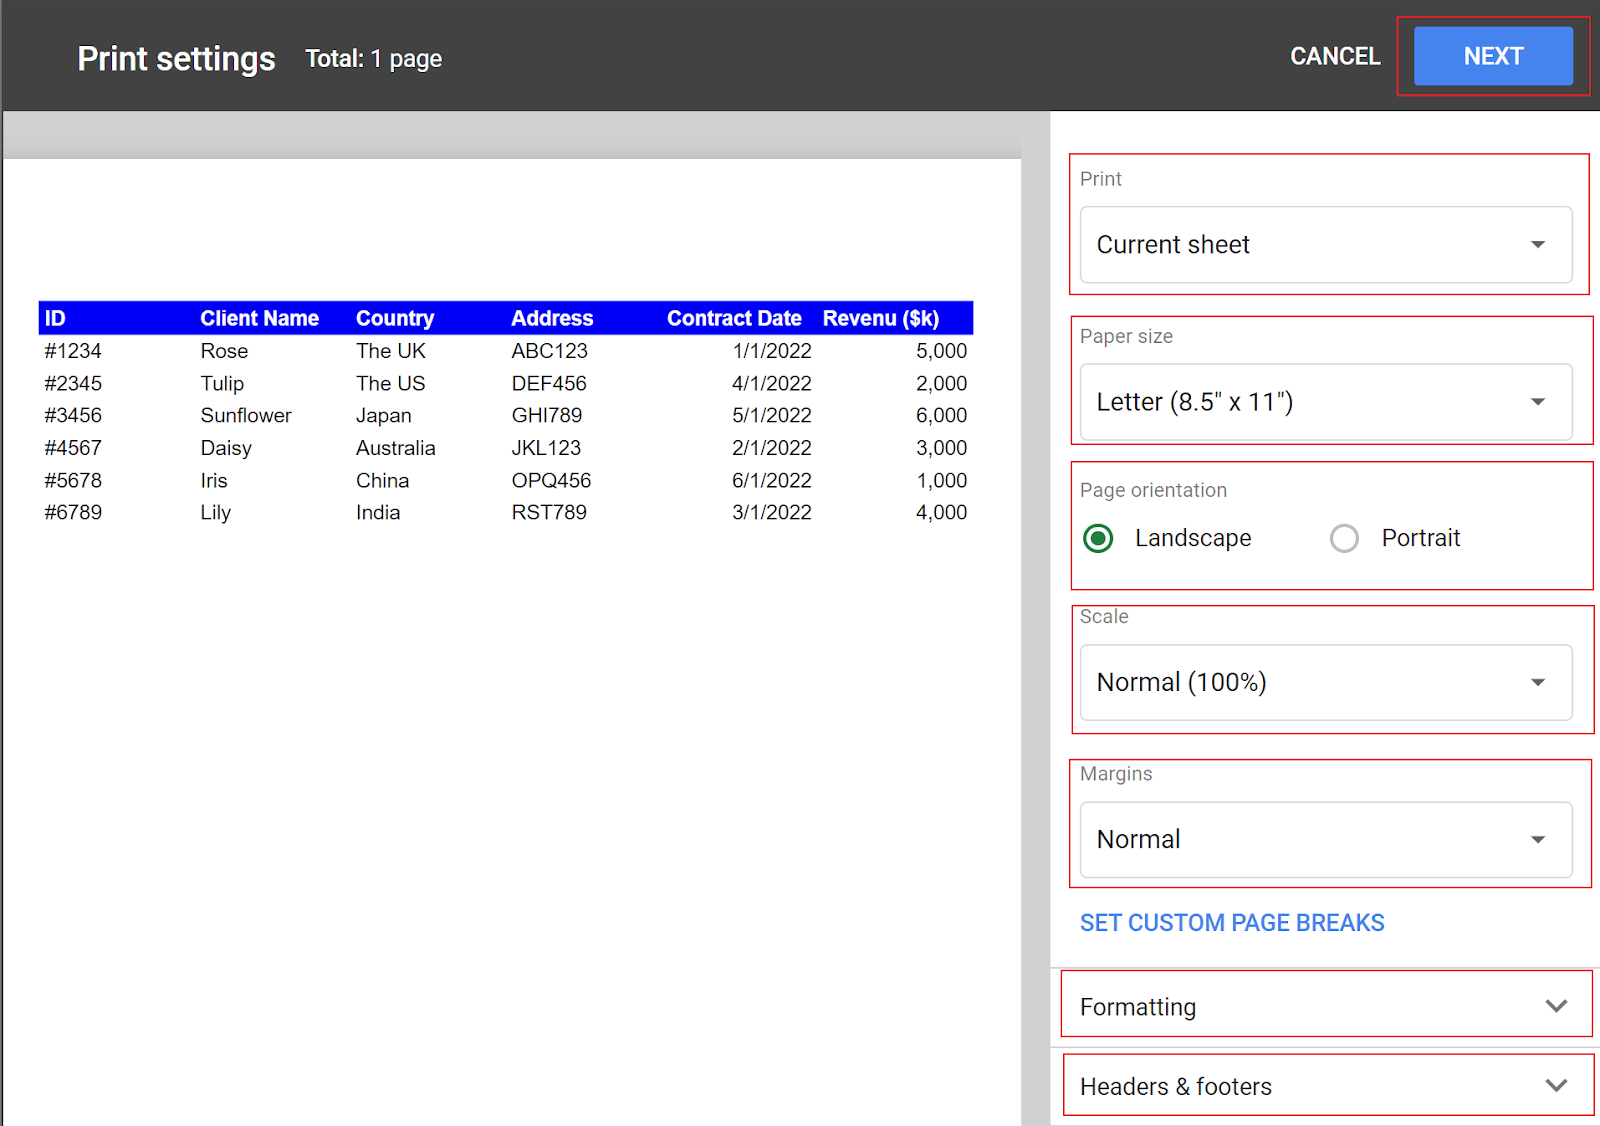
- Select a range you want to print area (if needed).
- Press “Ctrl”+”P” (for Windows) or “⌘”+“P” (for Mac)
- Change the print scope in the “Print” section.
- Choose “Paper size” and “Page orientation”.
- Select the “Scale” and the “Margins” from the drop-down lists.
- Adjust settings about formatting and headers&footers if needed.
- Click the “NEXT” button at the top right of your screen.

“Print”
Current sheet: Select if you want to print a working sheet you are working on
Workbook: Choose if you want to print an entire file
Selected cells: Pick up this option if you're going to print a portion of a worksheet
“Paper” / “Page orientation”: Choose the proper output paper size and orientation. You can set up a customized paper size if necessary.
“Scale”: Select one option from Normal (100%), Fit to width, Fit to height, or Fit to page according to the size and formatting of a selected range or a worksheet you will print.
“Margins”: Choose one option out of three types of margins, Normal, Narrow, and Wide. You can set up a bespoke margin range if needed.
“Formatting”
Show gridlines: You can show or hide gridlines on a printed page
Show note: You can also make notes in cells visible or invisible on a printed document
Page order: This option is beneficial when you print out a large range or worksheet containing a big table. If you choose “Down, then over”, the printing is done from top to bottom and left to right. If “Over, then down” is chosen, the printing is done from left to right, and top to bottom
Alignment (Horizontal): The locations of the selected range or worksheet can be aligned to the right, center, and left.
Alignment (Vertical): Their locations can also be aligned to the top, middle, and bottom.
“Headers&Footers”: You can determine by checking boxes if the following items show up on printings, though you can’t change their formatting or locations on a page.
Page numbers: a small number shows up on the bottom right of a page.
Worksheet title: A worksheet title pops up in a small font at the top left corner of a page.
Sheet name: A small sheet name appears on the top right of a page.
Current date: You can see a small date at the bottom left corner of a page.
Current time: Same as above. You can show both the date and time.
Repeat frozen rows*: This option is helpful when you print a vertically long table or list.
Repeat frozen columns*: This function is useful when you print a horizontally long table or list.
*Note: Navigate to the “View” tab → “Freeze” to select which rows/columns to repeat on all pages
Once you change the print settings, all changes are reflected in the printing preview shown in the print settings window.

