How to Make a Checkbox in Google Sheets
In this article, we will go over how to create a checkbox in Google Sheets.
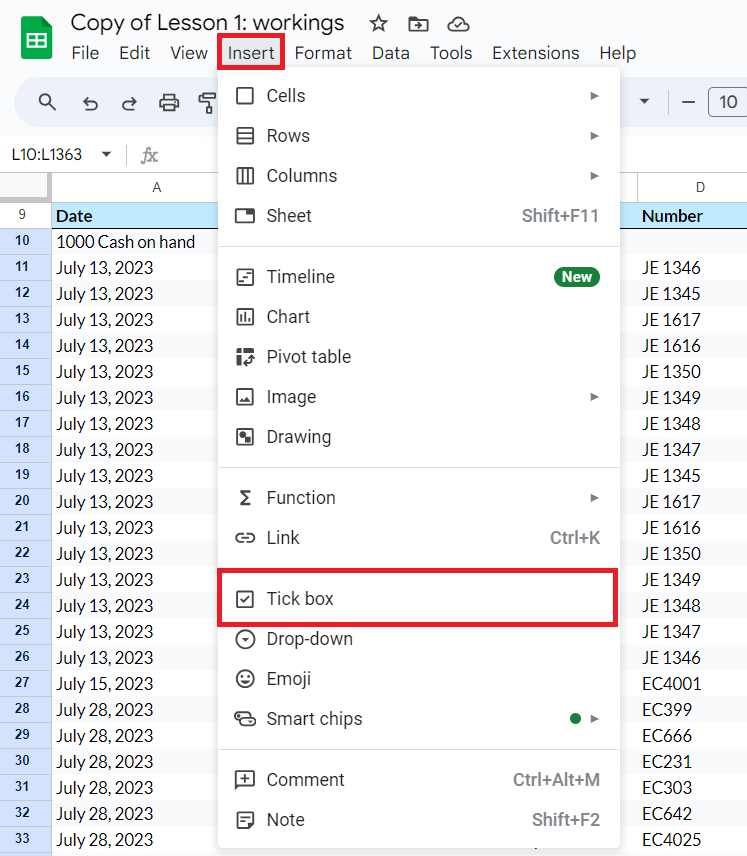
To create a checkbox in your worksheet, follow these steps:
- Select the cells you wish to have a checkbox.
- With these cells highlighted, select “Insert” and choose the “Tick Box” option from the toolbar.

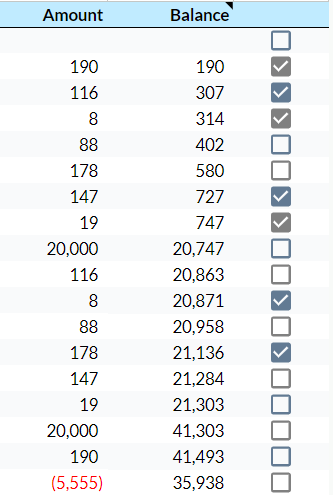
- Your highlighted cells will now have a checkbox in them.

When do I use Checkboxes in Google Sheets?
Checkboxes can have utility beyond being a useful visualization tool. A checkbox can be paired nicely with other functions dependent on IF statements, such as SUMIF and COUNTIF.
Google Sheets reads a checked box as “True” and an unchecked box as “False”. In the example below, we will be generating a sum based on the values corresponding to our checked boxes.
To begin, type the following into a cell to enter the SUMIF formula:
- For the first argument, you will select the range that has your checkboxes. In our example, it will be the range L10:L1363.
- The next argument is the criterion for our SUMIF. In this case, we want to sum when we return a “True” value. In the second argument, type “True”.
- Finally, select the range which contains the values to sum. In this example, it will be K:10:K1363.
- To summarize, this will sum the values from K10:K1363 when they return a “True” value in cells L10:L1363. You can do this in reverse to sum any unchecked boxes by changing the second argument to “False”.

Other Ways to Customize your Google Sheets Cells
While the above steps outline how to get checkboxes for your cells, this is not the only way to have custom inputs in a cell. Data validation allows you to control what can be put into a cell, as well as having custom drop-downs for your cells.
For more tips like these as well as custom Google Sheets templates, check out LiveFlow and book a demo.

