How to Insert Multiple Rows in Google Sheets
In this article, you will learn how to add multiple rows in Google Sheets.
(Note: Some of the shortcuts below may not work for all keyboards.)
How to add rows in Google Sheets
With shortcuts - 1
- Press “Shift” and then “Space” to select the entire row above which you want to insert additional rows.
- While holding “Shift” down, press “↓” one time less than the number of rows you need to insert (e.g., four times for five additional rows).
- Press “Ctrl”+”Alt”+“=” (for Windows) or “⌘” + “Option” + “=” (for Mac).
With shortcuts - 2
- Select as many cells in a column as the number of rows you want to insert.
- Press “Alt”+”Shift”*+“I” together and then “R” (for Windows) or “Ctrl” + “Option” + “I”, then “R” (for Mac) to insert rows above the cells
- Press “Alt”+”Shift”*+“I” and then “W” (for Windows), or “Ctrl”+“Option”+“I”, then “B” (for Mac) to insert rows below the cells
*If you use Google Chrome, you don’t need to press “Shift” at this step.
Without shortcuts
- Select an entire row by clicking row number X (e.g., 6).
- While pressing “Shift”, click another row number Y (e.g., 10).
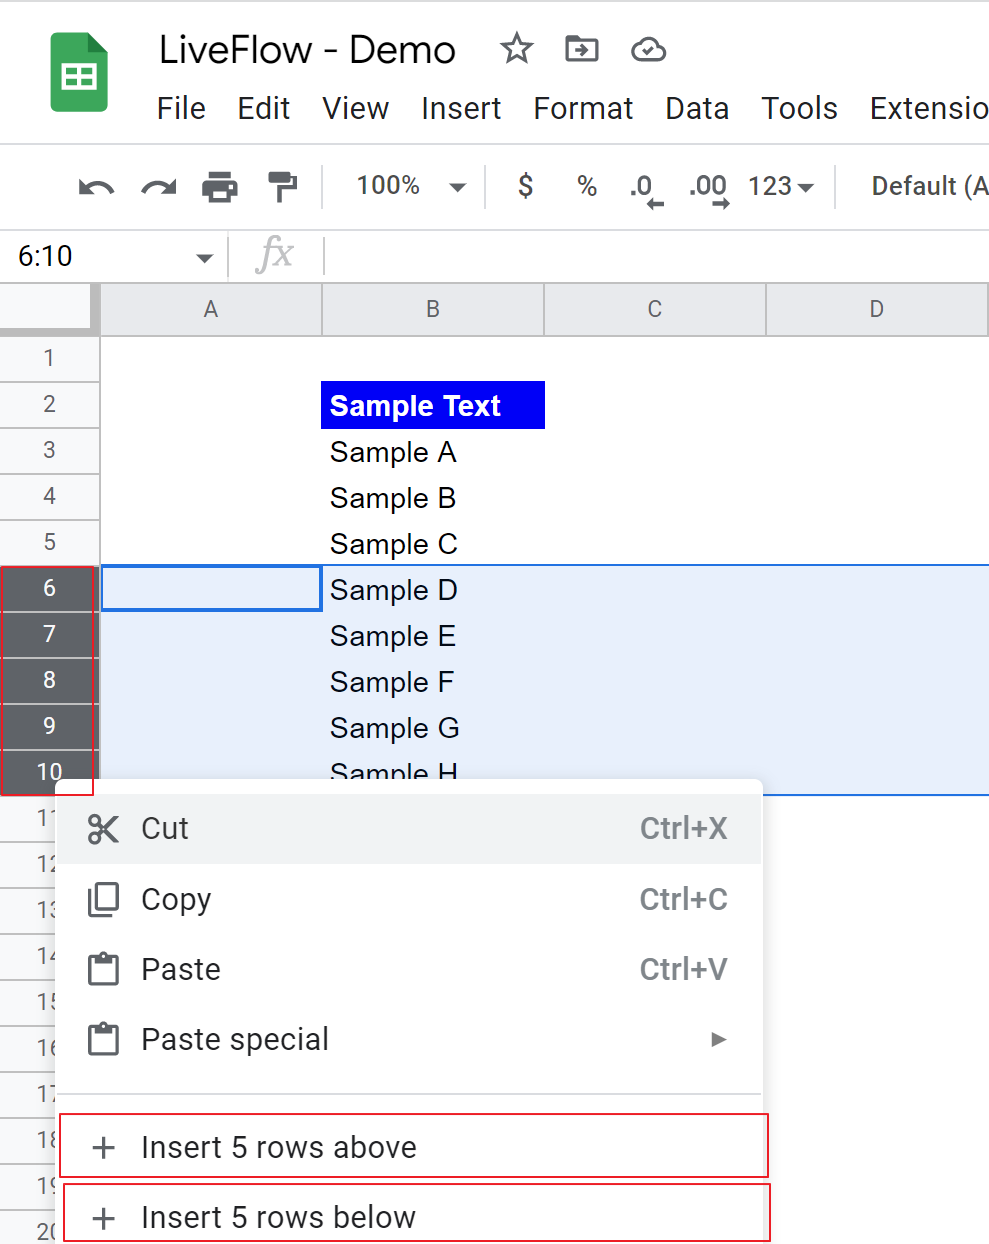
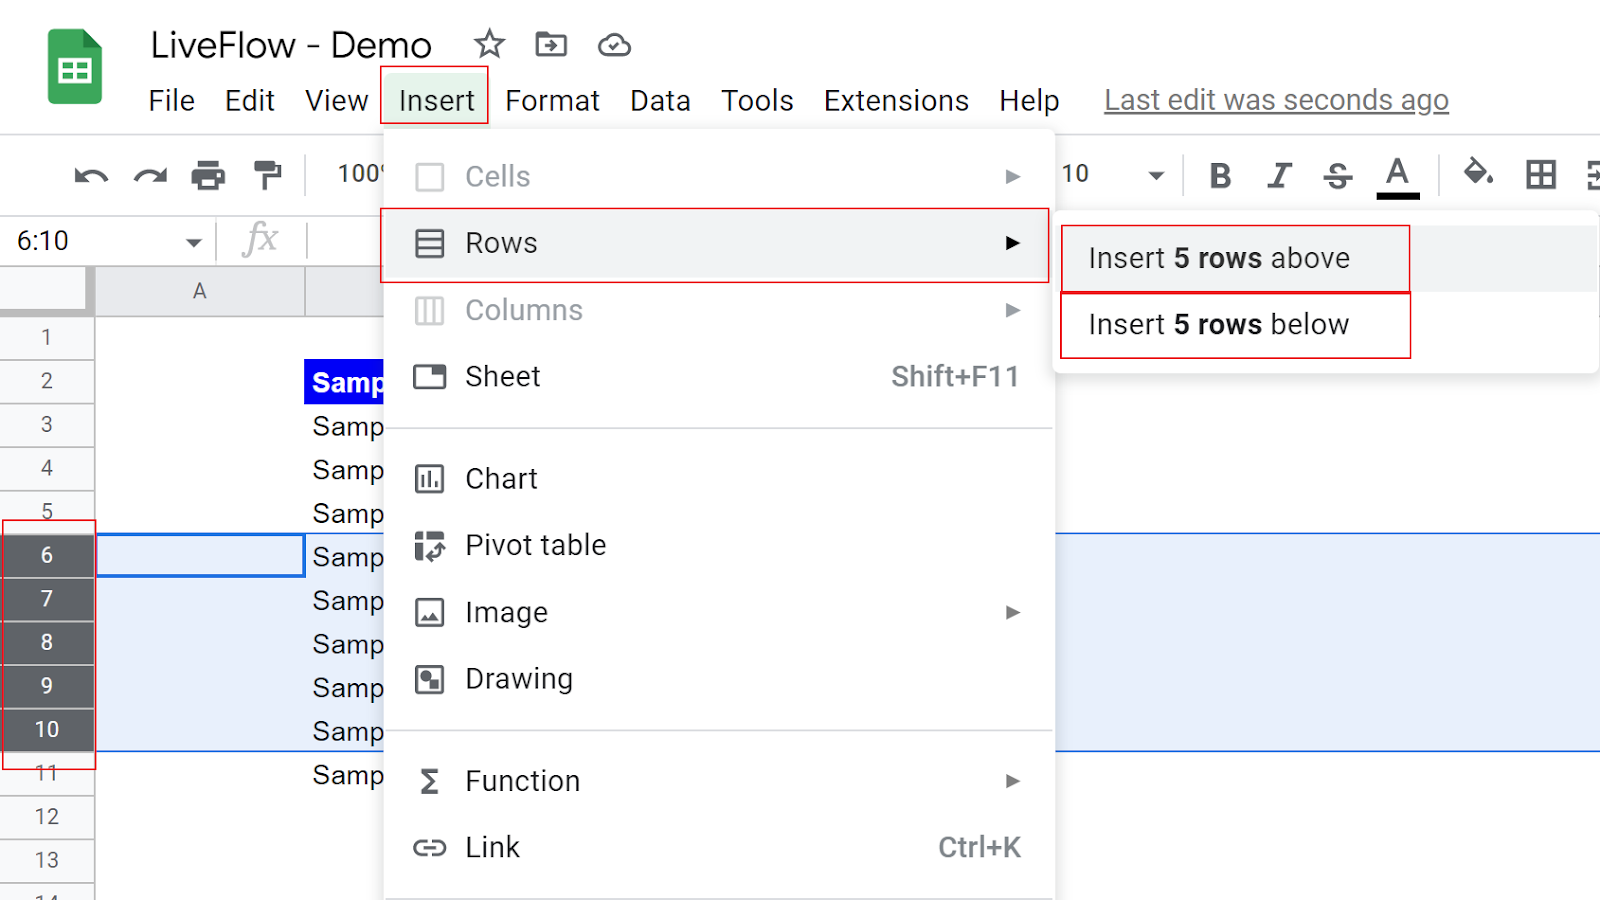
- Right-click or go to “Insert” tab → “Rows”, and select if you insert |X-Y|+1 (e.g., 5) rows above or below.
The following two screenshots are for Step 3 of “Without shortcuts”.


How do I cut rows in Google Sheets?
With shortcuts - 1
- Press “Shift” and then “Space” to select the top or bottom row in the rows you want to delete.
- While holding “Shift” down, press “↑” or “↓” and select all rows you want to remove (we assume they are adjacent).
- Press “Ctrl”+”Alt”+ “-” (for Windows) or ”⌘” + “Option” + “-” (for Mac).
With shortcuts - 2
- Select at least one cell in each row in the range you want to delete. (e.g., cell C3 to cell C8 if you're going to delete Row 3 to 8).
- Press “Alt”+”Shift”*+“E” and then “D” (for Windows) or “Ctrl”+“Option”+“E”, then “D” (for Mac).
- Select “Delete row X-Y”.
*If you use Google Chrome, you don’t need to press “Shift” at this step.
Without shortcuts
- Select the top row in the rows you want to delete by clicking row number X (e.g., 8).
- While pressing “Shift,” click the bottom row number Y (e.g., 11) in the rows.
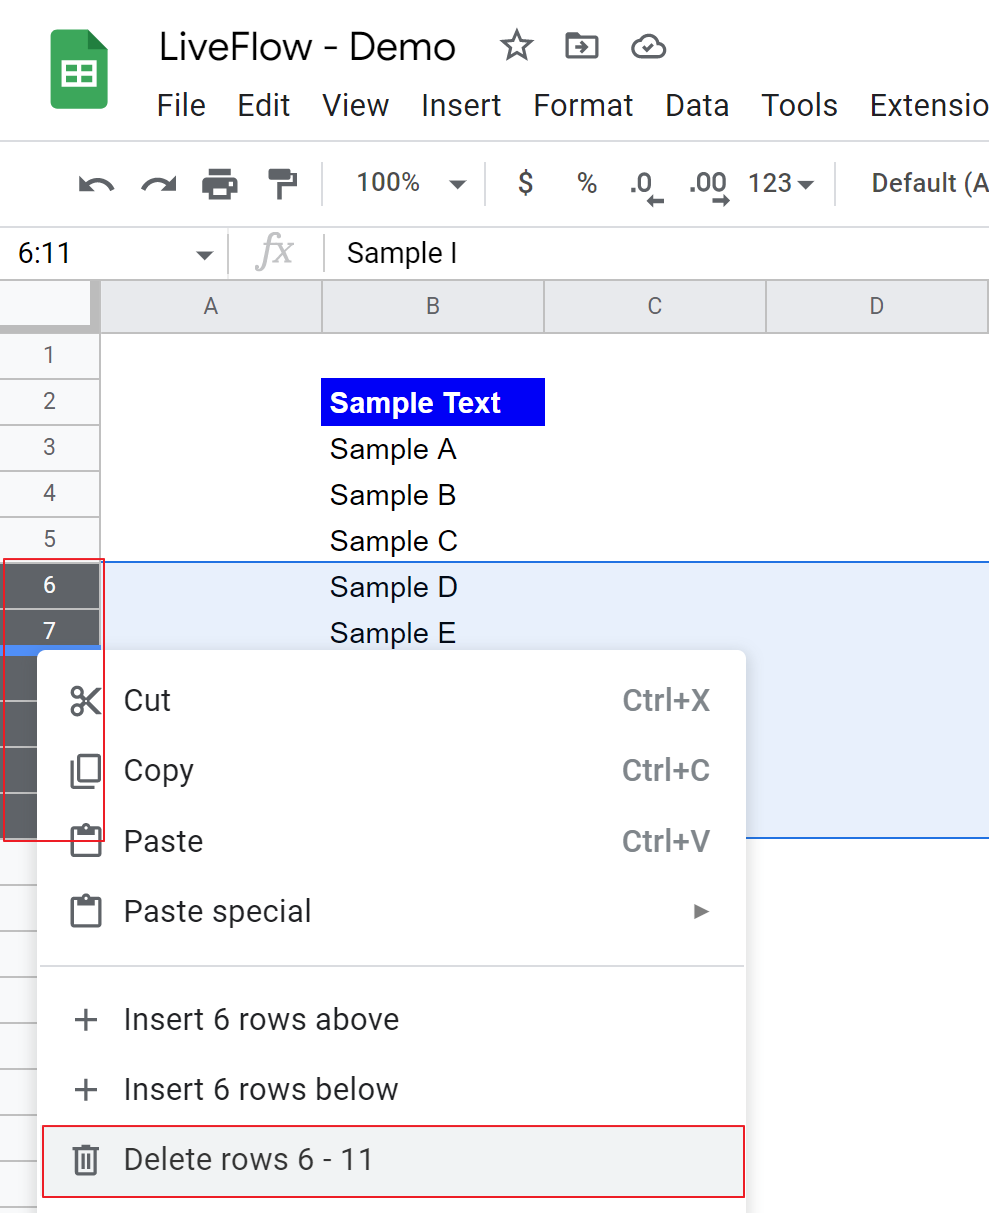
- Right-click and click “Delete rows X-Y” (e.g., Delete rows 8-11”).
The picture below is for Step 3 of “Without shortcuts”.


