How to Add a Drop Down List in Excel (7-Minute Easy Guide)
In this article, we will explore the benefits and use cases of creating drop down menus in Excel, followed by a step-by-step guide to inserting lists in your Excel sheets.
Benefits of creating drop down menus in Excel
- Data Consistency: Drop down lists in Excel allow you to limit the data entry options to a predefined set of values, ensuring that data is consistent and accurate. This minimizes the risk of data-entry errors and simplifies data analysis and reporting in Excel.
- Improved Productivity: By offering a pre-populated list of options, drop down lists streamline data entry tasks, reducing the time spent typing and correcting errors in Excel. This saves time and effort, ultimately increasing productivity.
- Enhanced User Experience: Lists in Excel provide a user-friendly interface for users entering data, making it easy for them to select from a list of predefined choices.
- Dynamic Data Validation: Drop down lists can be linked to other cells in the worksheet, allowing you to create dynamic data validation rules. This means that the list of options can be updated automatically based on the values in other cells.
Use cases for inserting lists in Excel
- Inventory Management: Drop down menus can be used to manage product categories, suppliers, or warehouse locations, ensuring that the data is consistent across multiple entries in Excel.
- Financial Reporting: Inserting lists in Excel can be used to create standardized expense categories, revenue streams, etc. which allows for consistent reporting and analysis.
- Project Management: Create drop down lists to manage project statuses, priorities, or assignees, thereby simplifying project tracking and project management in Excel.
- Data Collection: Use drop down lists to standardize the collection of survey responses, customer feedback, or any other data that requires consistent categorization.
Step-by-step process on adding drop down lists in Excel sheets
Step 1: Create a list of items you want to include in your drop down list in a separate range of cells.
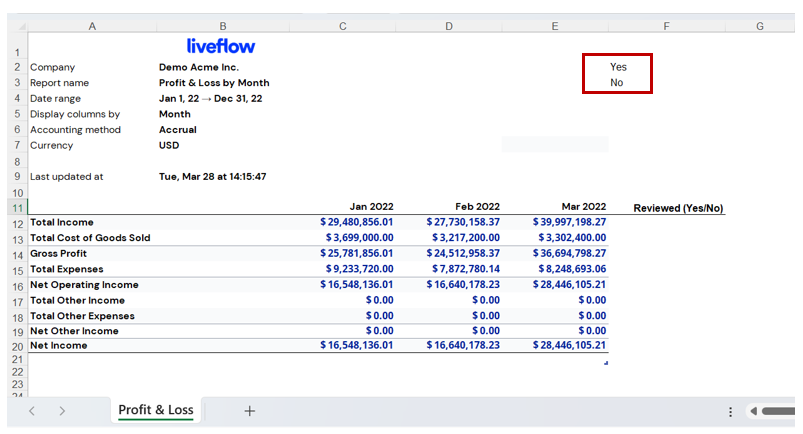
For instance, suppose you want to create a list that allows a reviewer of your Excel sheet to update the status of line items, indicating whether they have been reviewed or not. In this case, you would need to insert a list containing the options 'Yes' and 'No'. To begin, enter the two options 'Yes' and 'No' in any two adjacent cells within your Excel sheet. As illustrated in the image below, we have entered 'Yes' in cell F2 and 'No' in cell F3.

Step 2: Click on the cell where you want to insert the drop down list. This is the cell where users will be able to select an item from the list in Excel.
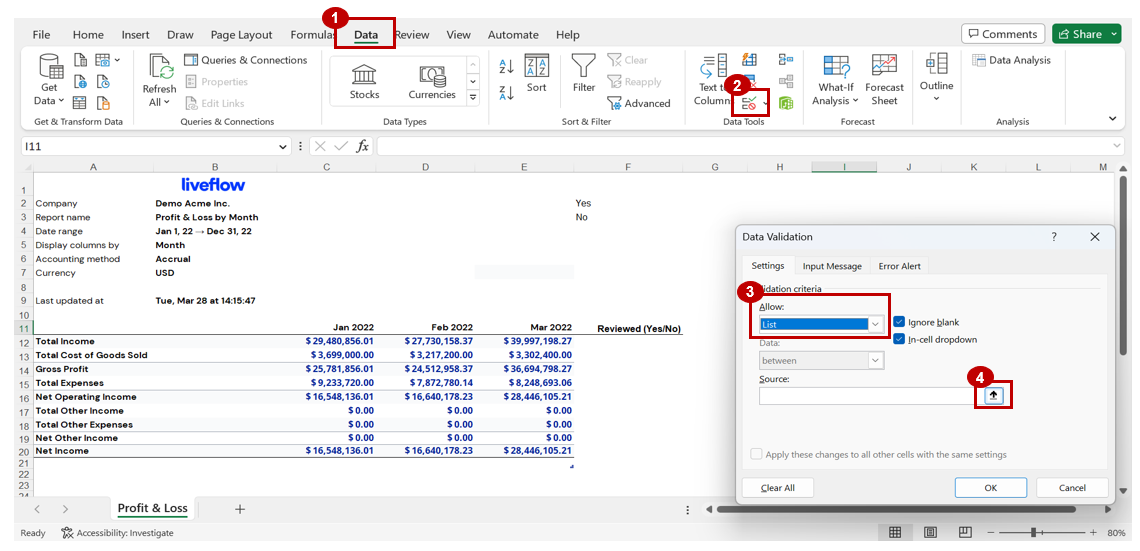
Step 3: Navigate to the 'Data' tab in the Excel ribbon, and click on the 'Data Validation' button in the 'Data Tools' group.
Step 4: In the dialogue box that opens up, select 'List' from the 'Allow:' drop down menu.
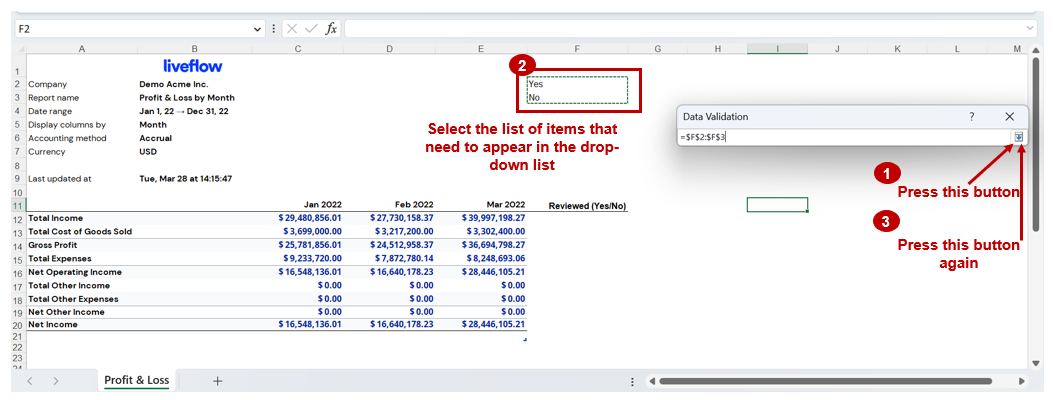
Step 5: Click on the 'Source:' box, and then select the range of cells containing the list of items you created in Step 1.


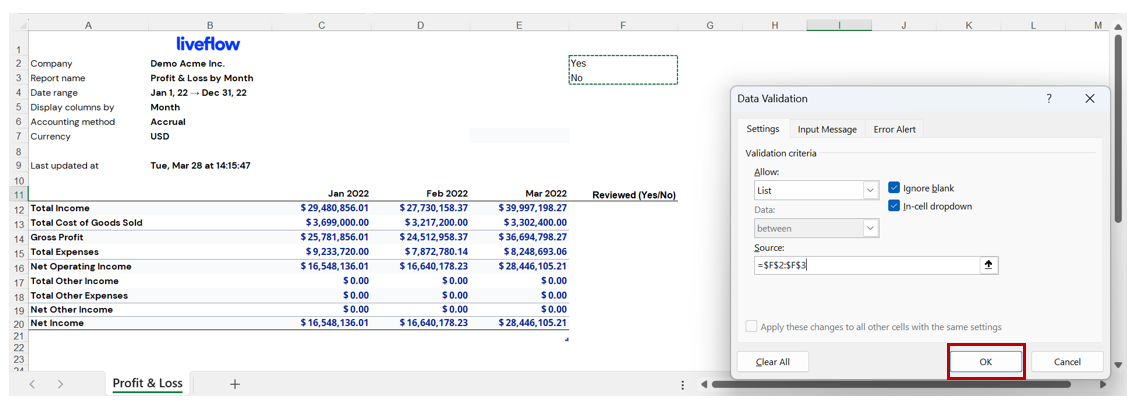
Step 6: Click on the 'OK' button.

Step 7: Your drop down list is now ready for use. Click on the cell selected in step 2, and you will see a small arrow indicating the presence of a drop down list. Click on the arrow to see the list of items and select one.


