Named Ranges in Excel: Explained
In this article, you will learn what is Named Ranges and how to use them in Excel
What are Named Ranges in Excel?
In Excel, a named range is a user-defined name assigned to a specific range of cells. Instead of referring to cells by their cell references (e.g., A1:B10), you can assign a meaningful name to a range of cells. This makes it easier to understand and reference the data within that range.
Named ranges are used to simplify formulas, improve readability, and make it easier to work with specific ranges of data in Excel. They provide a descriptive name that represents a group of cells, making it more intuitive to refer to that range in formulas, functions, and data analysis.
Note: Named ranges can have different scopes, which determine where they can be used within the workbook. By default, named ranges have workbook scope, meaning they can be referenced in any worksheet within the workbook. However, you can also define named ranges with sheet-specific scope, which restricts their usage to a particular worksheet.
How to create a Named Range in Excel?
To create a named range in Excel, you can follow these steps:
Step 1: Select the cells you want to include in the named range. You can select a single cell, a range of cells, or even multiple non-adjacent ranges by holding down the Ctrl key while selecting.
Step 2: Go to the "Formulas" tab in the Excel ribbon.
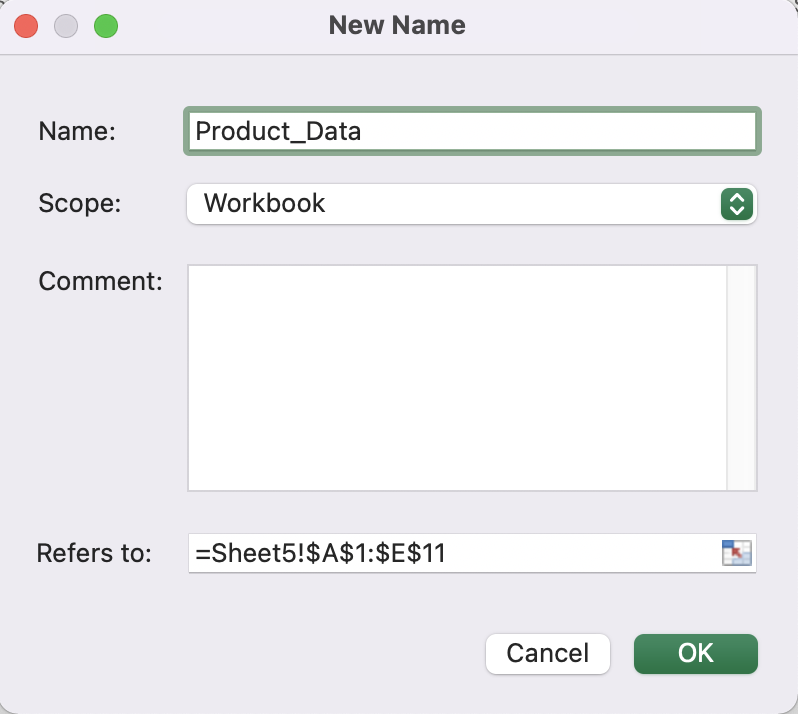
Step 3: Click on the "Define Name" button in the "Defined Names" group. This will open the "New Name" dialog box.

Alternatively, you can also select the range of cells, right-click, choose "Define Name" from the context menu, and enter the name for the range to create a Named Range in Excel.
Step 4: In the "Name" field, enter the name you want to assign to the range. Make sure to follow the naming conventions, such as starting with a letter and not including spaces or special characters.
Step 5: Verify that the "Scope" dropdown is set to the appropriate option. By default, it will be set to "Workbook," which makes the named range available throughout the entire workbook. You can also choose to limit the scope to the current worksheet.

Step 6: In the "Refers to" field, you should see the cell references of the selected range automatically populated. If not, you can manually enter the cell references or use the mouse to select the range in the worksheet.
Step 7: Click the "OK" button to create the named range.
Once you have created a named range, you can refer to it in formulas and functions using its assigned name. This makes it easier to work with ranges of cells in Excel without having to remember or type the specific cell references.
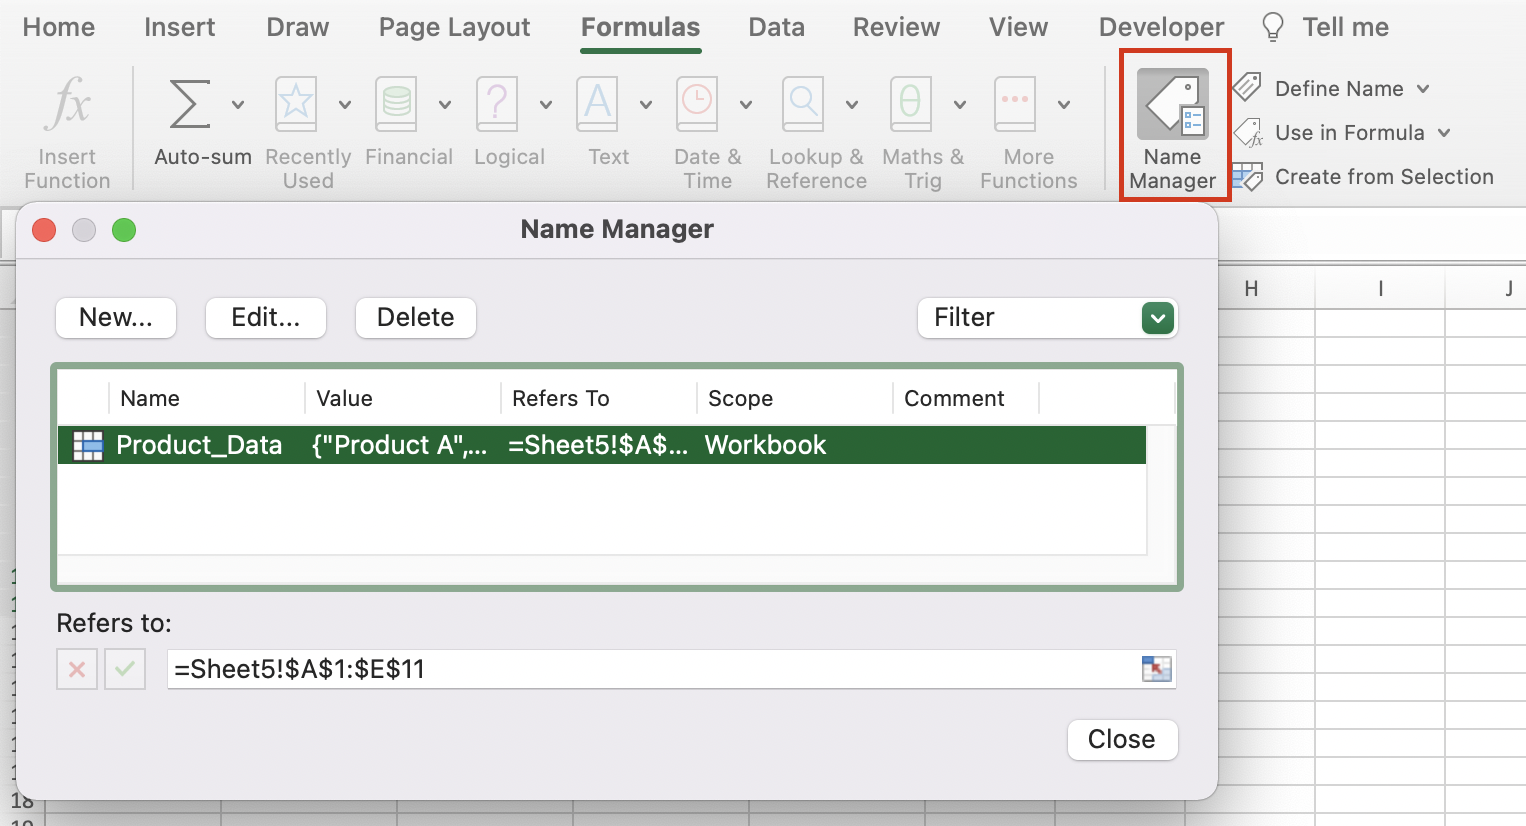
To edit or manage named ranges, you can go to the "Formulas" tab, click on the "Name Manager" button in the "Defined Names" group. This will open the "Name Manager" dialog box, where you can view, edit, or delete existing named ranges.

What are some Benefits of using Named Ranges in Excel?
Using named ranges offers several benefits, including:
- Improved readability and understanding of formulas and functions.
- Flexibility when adding or removing rows or columns within the named range.
- Easier navigation within large workbooks.
- Enhanced collaboration and sharing of workbooks, as named ranges provide context and clarity to others working with the data.
Named ranges provide a convenient way to reference and work with specific ranges of data in Excel. They can be particularly useful when dealing with complex formulas, extensive datasets, and large workbooks.

